Roof flashing failures are one of the most common causes of roof leaks we diagnose. Unfortunately, many leaks get worse because of improper repair attempts using the wrong materials or techniques.
This article outlines common flashing repair mistakes we frequently encounter, explains why they fail, and includes a real case study showing how a flashing leak was permanently fixed after an improper repair.
Related case study: We also documented a similar issue involving vent pipe flashing here.
Mistake #1: Assuming Existing Flashing Is Still Good
Never assume roof flashing is in good condition simply because it looks intact. Flashing can deteriorate underneath shingles, behind siding, or beneath layers of caulk where damage is hidden.
If a roof has been leaking for an extended period, the flashing should be inspected closely — often requiring partial disassembly — to determine whether replacement is necessary.
When the source is unclear, a professional roof leak inspection is often the only reliable way to identify the true failure point.
Mistake #2: Using the Wrong Caulk
Not all caulks are designed for roof flashing repairs. Using incompatible or low-grade sealants often leads to cracking, separation, and renewed leaks within months.
Many temporary repairs rely on excessive caulk instead of proper flashing integration, which almost always fails under temperature changes and UV exposure.
Mistake #3: Over-Caulking the Flashing Area
Applying too much caulk is just as problematic as using the wrong product. Over-caulking can trap moisture, block proper drainage paths, and accelerate deterioration beneath the repair.
We frequently find leaks where heavy caulk was used to compensate for missing or improperly installed flashing, a short-term fix that causes long-term damage.
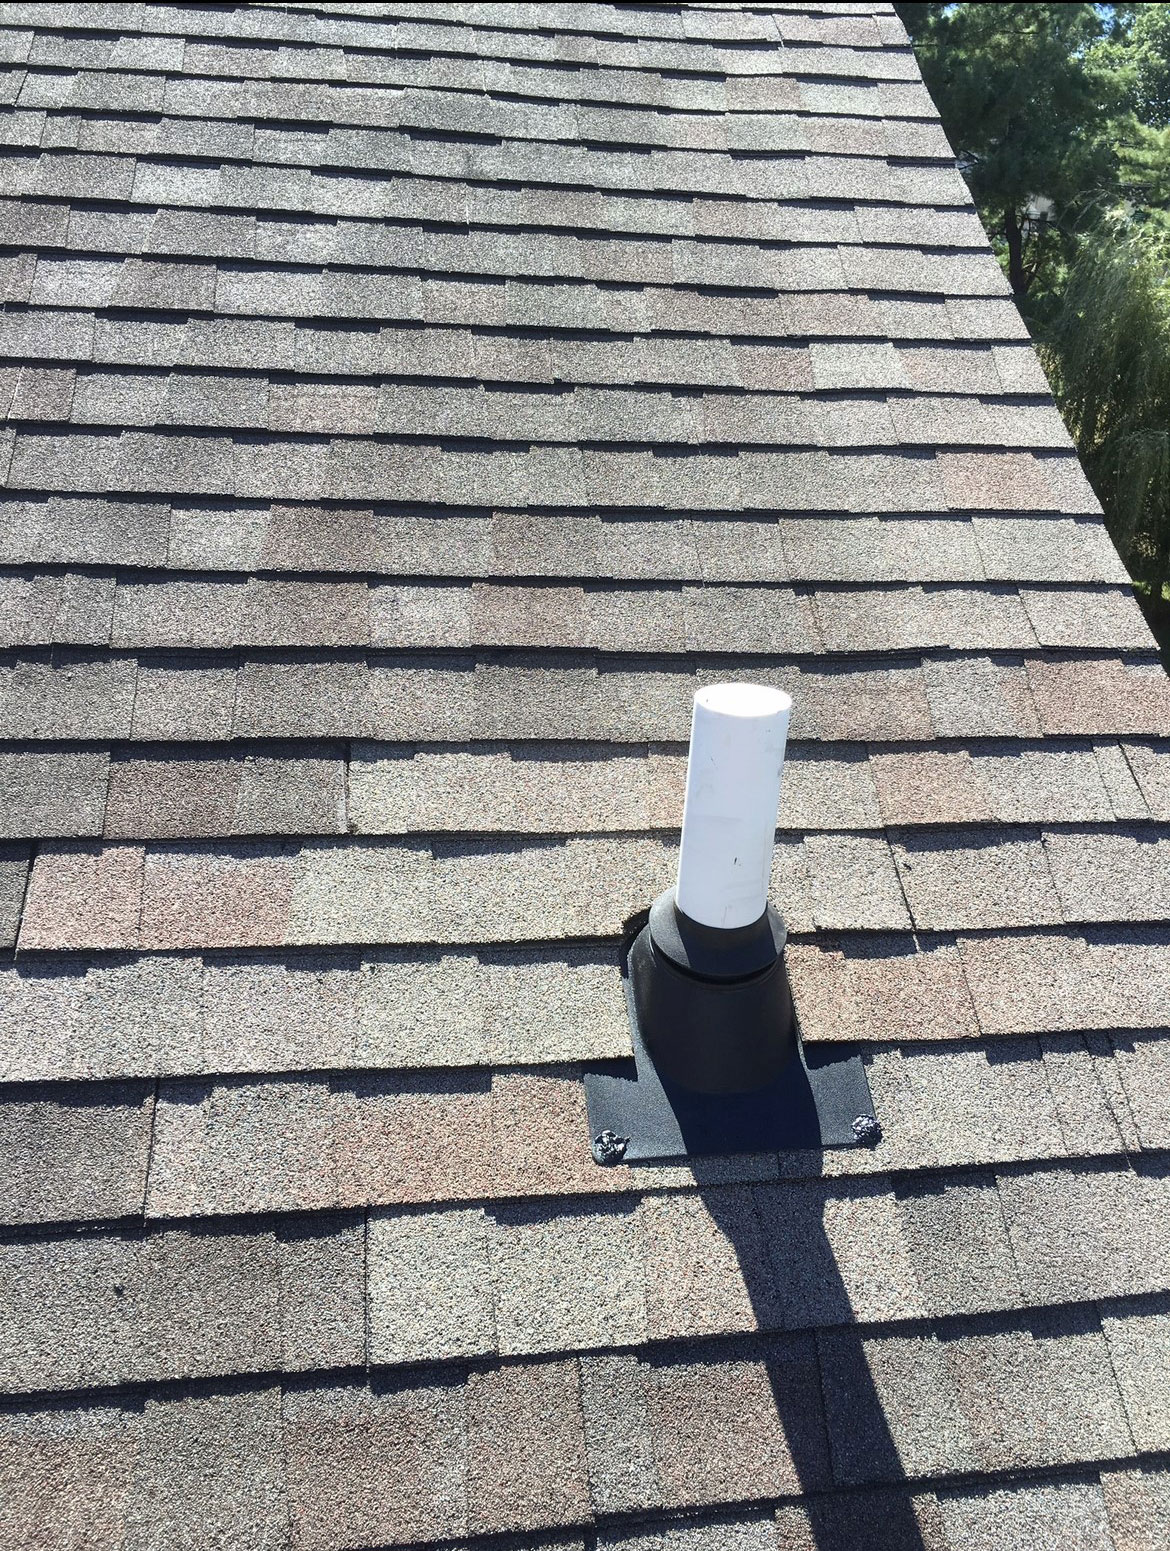
Mistake #4: Ignoring Vent Pipe Flashing
Vent pipe flashing failures are often overlooked during roof repairs. Improper shingle placement, missing underlayment, or degraded rubber boots can allow water to enter the roof system.
If vent flashing is damaged or installed incorrectly, water intrusion is inevitable.
Case Study: Flashing Repair Done Wrong — Then Fixed Correctly
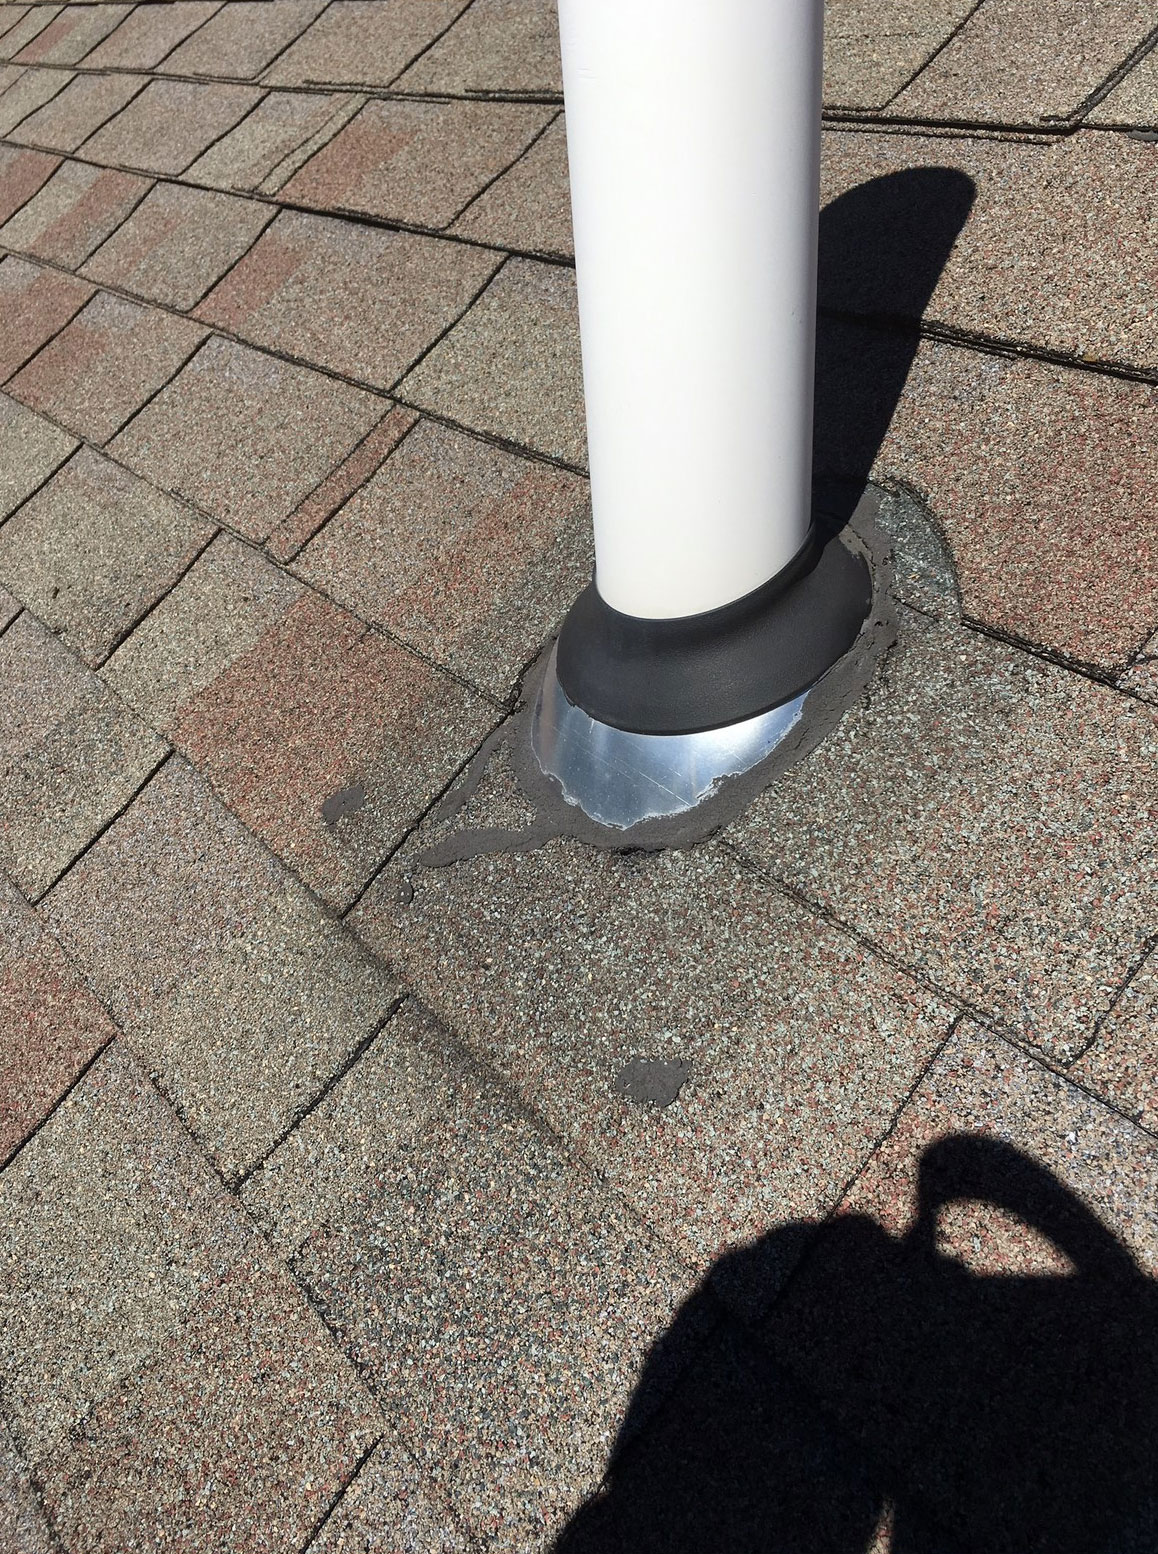
In this project, a homeowner was told by another contractor that their vent pipe flashing had been repaired. However, the leak persisted.
Upon inspection, we found low-quality caulk applied over improperly installed flashing. Worse, the shingles had been installed over the bottom flange of the vent flashing, trapping water instead of directing it away.
To correct the issue, we removed the failed flashing and installed a properly integrated Pro 2 no-leak vent pipe flashing system. This ensured correct water flow and a permanent seal.
The repair eliminated the leak entirely and restored proper roof drainage.
Proper Flashing Repair Prevents Long-Term Damage
Flashing repairs must be performed correctly using proper materials and installation methods. Temporary fixes almost always lead to recurring leaks, interior damage, and higher repair costs.
For professional flashing diagnosis and permanent repairs, visit our Roof Flashing Leak Repair service page.
If you’re dealing with a persistent roof leak, contact us to schedule an inspection and get it fixed correctly the first time.

Jon transitioned into custom residential home construction with an opportunity to become a working partner with Mike Evangelist. Since roofing had been a large part of my past work experience, it was a natural fit. Finding and detecting hard-to-track roof leaks is our specialty.
- Roof Leak Repair Case Study: Garage Ceiling Leak Caused by Missing House Wrap - January 28, 2025
- Kick-Out Flashing Repair: Solving a Bathroom Leak During Heavy Rain - November 29, 2023
- Proper Vent Pipe Flashing: The Key to a Leak-Free Roof - October 31, 2023
In Florida daylight to put the shingle over top of the flashing so the water gets underneath the shingles in Florida you will fall your inspection if you do it the right way